Budget billing and final invoice (cumulative, single)
Written By CAL
Last updated 2 months ago
Progress and Final Invoices Cumulative by Bill of Quantities
With the Progress Invoice (by Bill of Quantities, Cumulative) feature, you can invoice your project step by step based on a bill of quantities (BoQ). Each new progress invoice automatically includes all previously invoiced quantities as well as the current increase—the final invoice summarizes everything at the end.
Prerequisites
You are working in the Calculation module in the Quotes section.
The quote you want to bill has the status Completed.
1. Convert the quote into a cumulative progress invoice
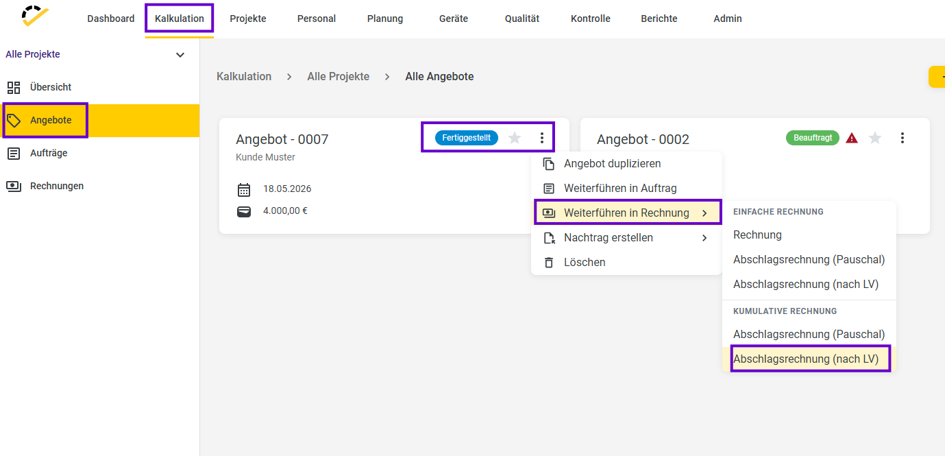
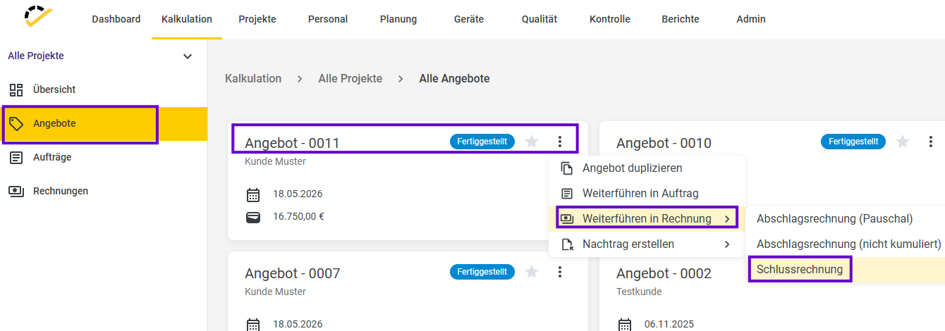
Open the completed quote in the Quotes section.
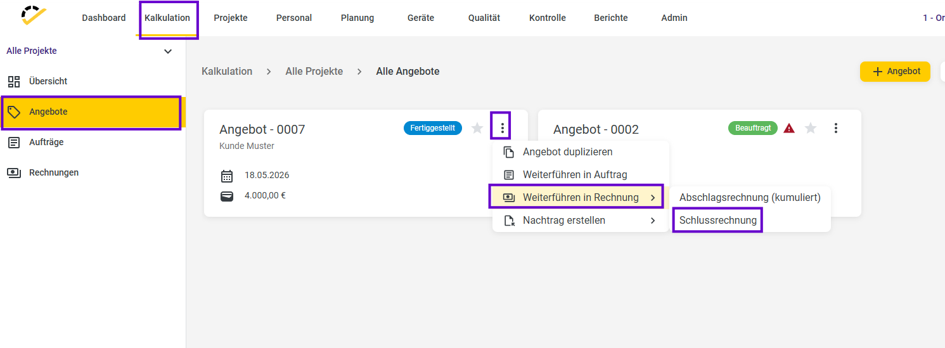
Click on the three vertical dots.
Select Continue to Invoice → Cumulative Invoice → Installment Invoice (by Bill of Quantities).
2. Create the first cumulative progress invoice
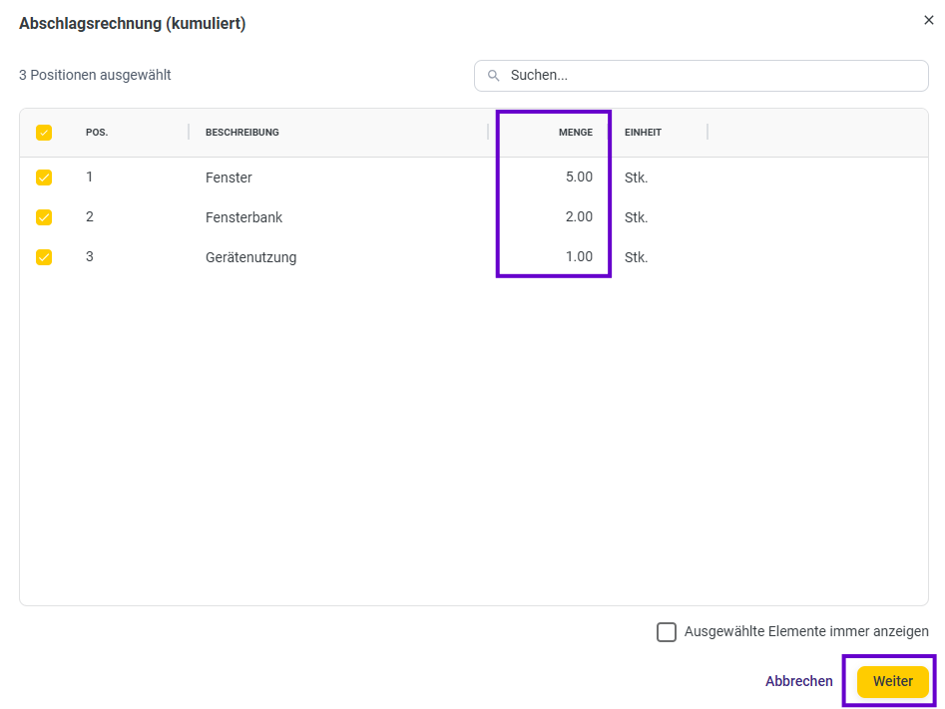
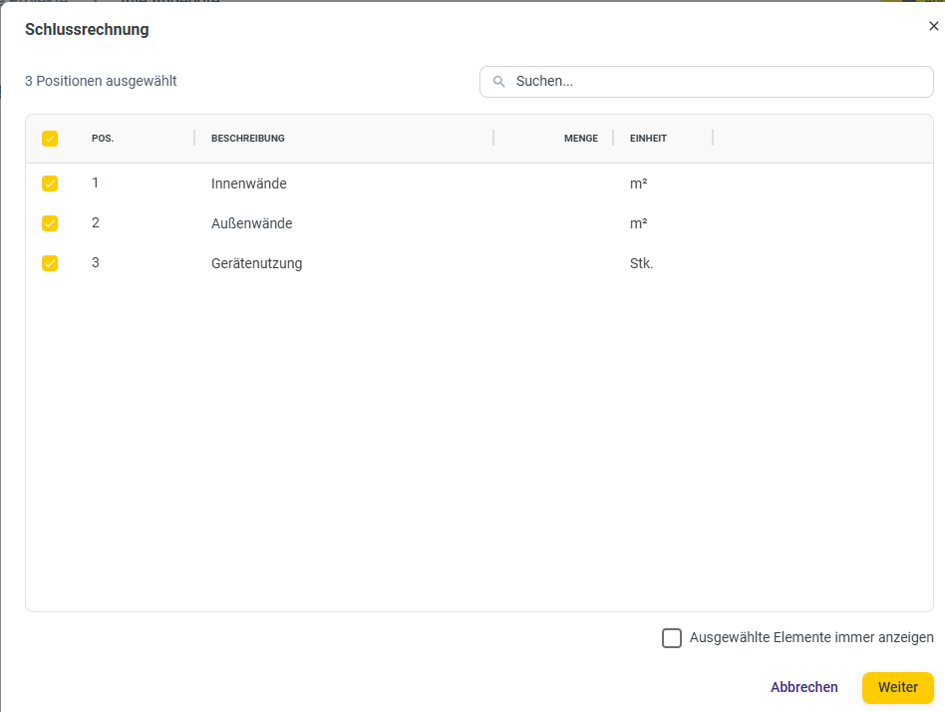
In the dialog, select the work order items you want to bill.
Enter the first quantities to be billed (e.g., 5 out of 10 units).
Confirm your selection—the system will generate the first cumulative partial invoice with the corresponding amounts
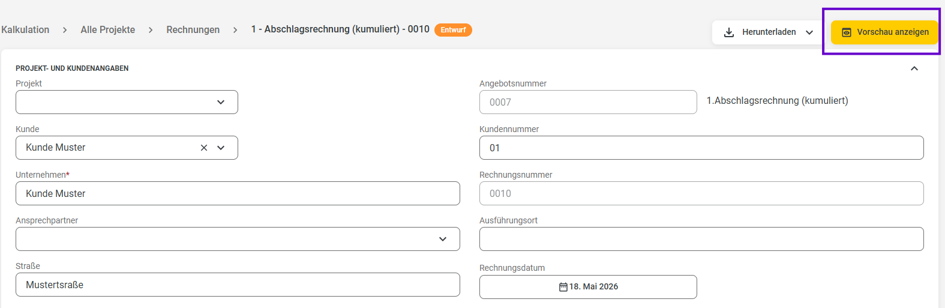
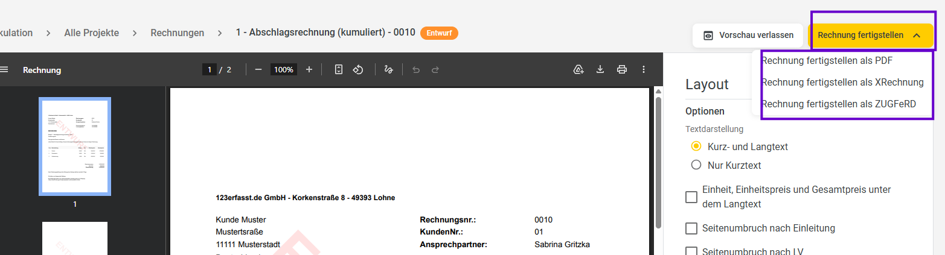
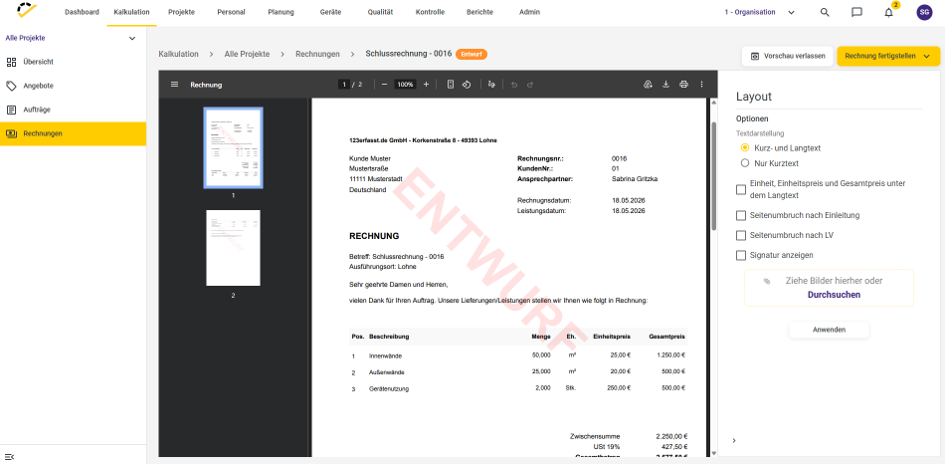
Check the items, quantities, and totals, then click Show Preview to finalize. You can now finalize the invoice.
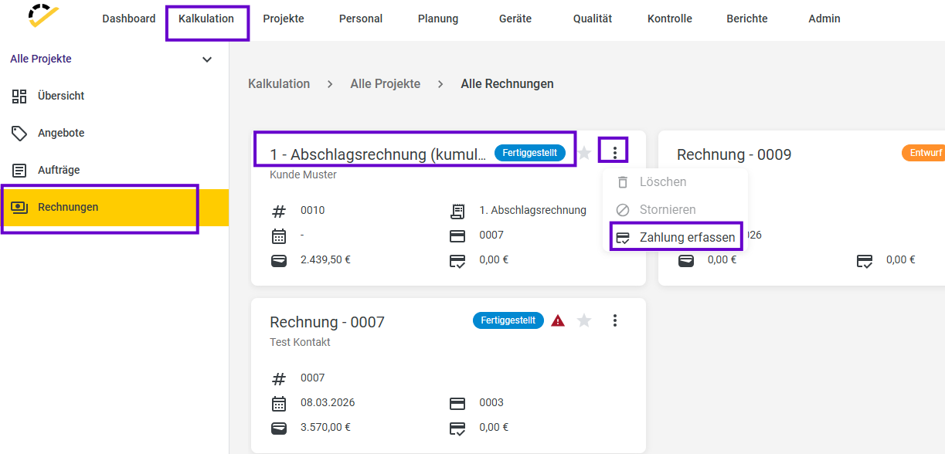
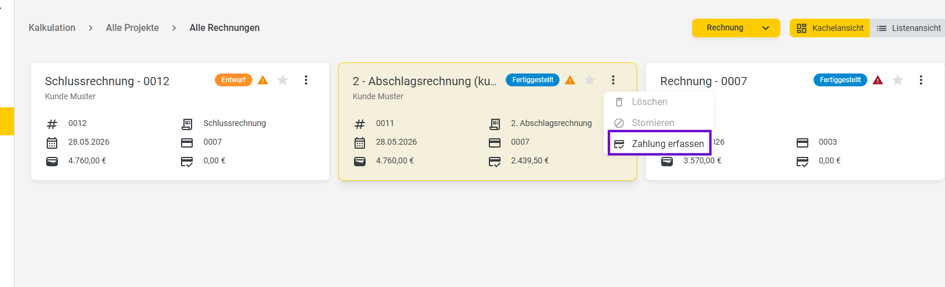
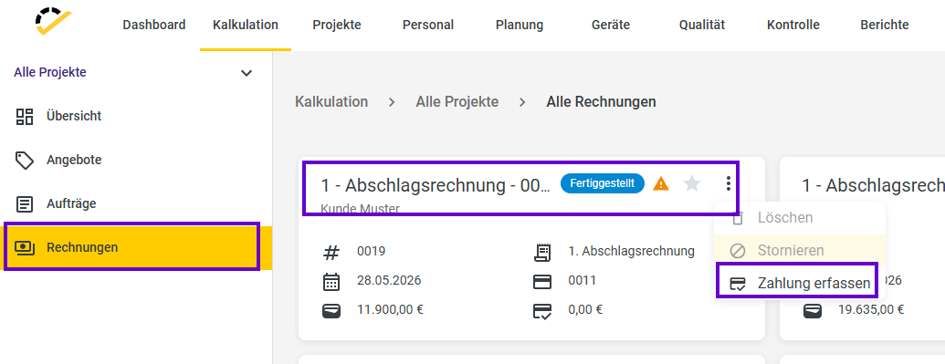
3. Enter payments for the installment invoice
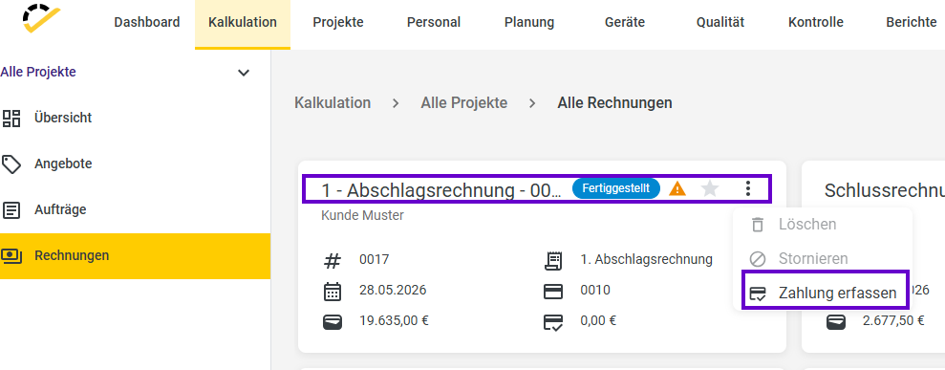
Open the completed installment invoice.
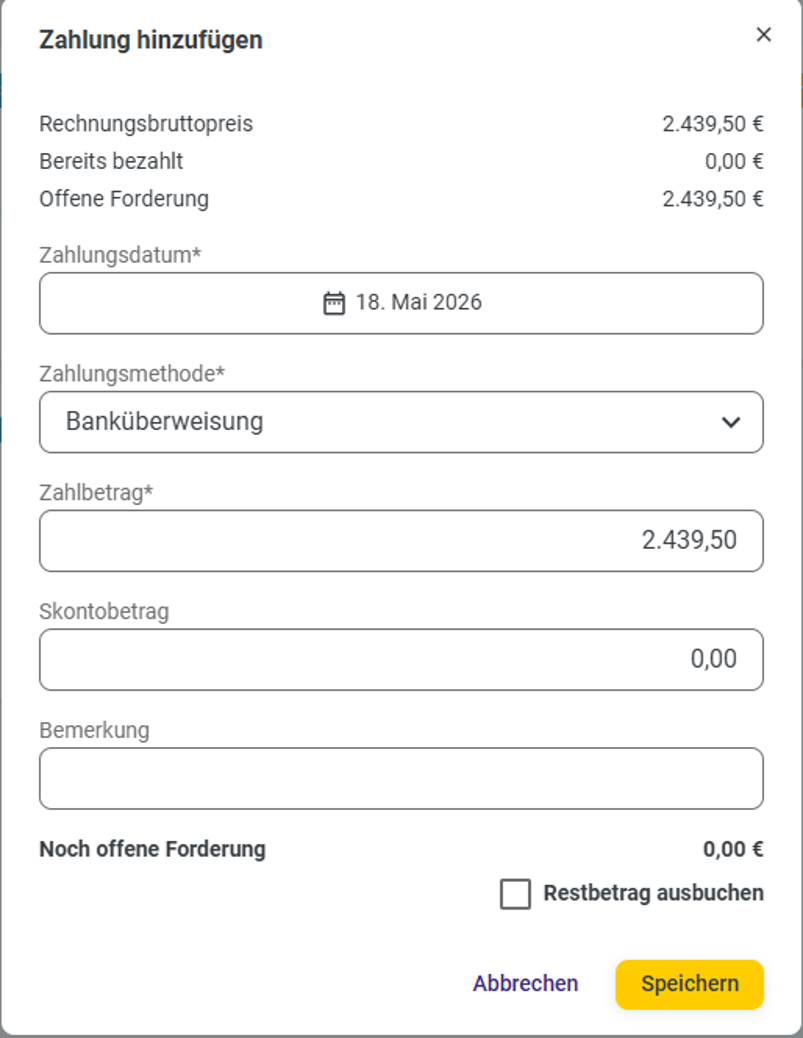
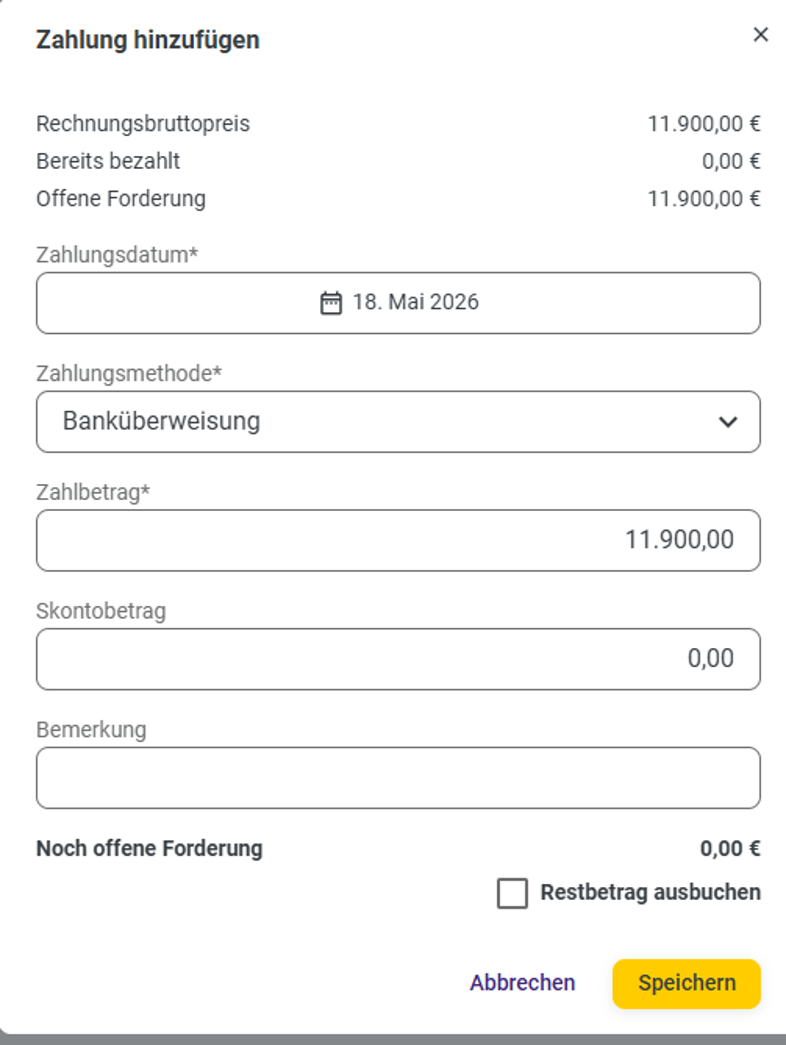
Use the payment function to add the date, payment method, and amount.
Repeat this for additional partial or full payments.
4. Generate additional cumulative progress invoices
Open the quote again and select Continue to Invoice → Installment Invoice (by Specification) in the Cumulative Invoice section.
Add additional quantities to the corresponding bill of materials items.
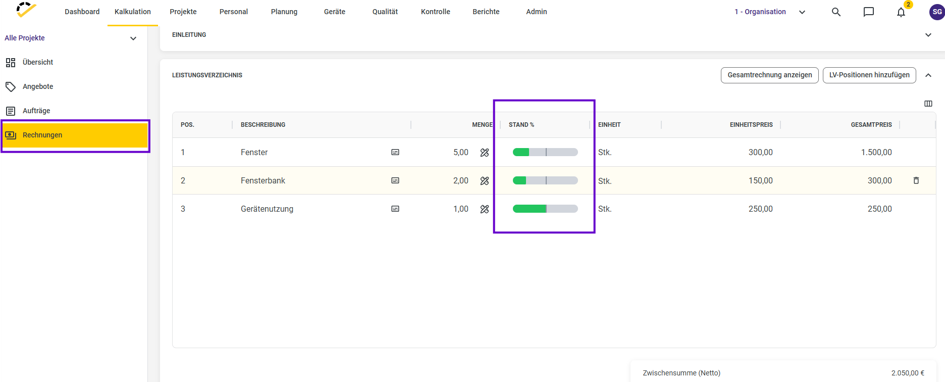
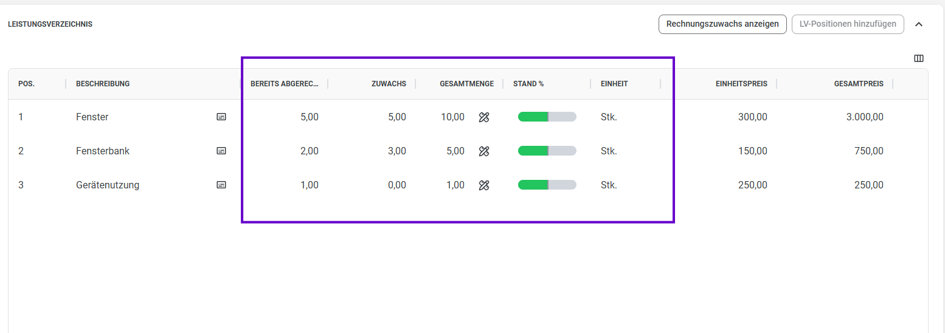
The system automatically takes into account all quantities invoiced so far and calculates only the new increase.

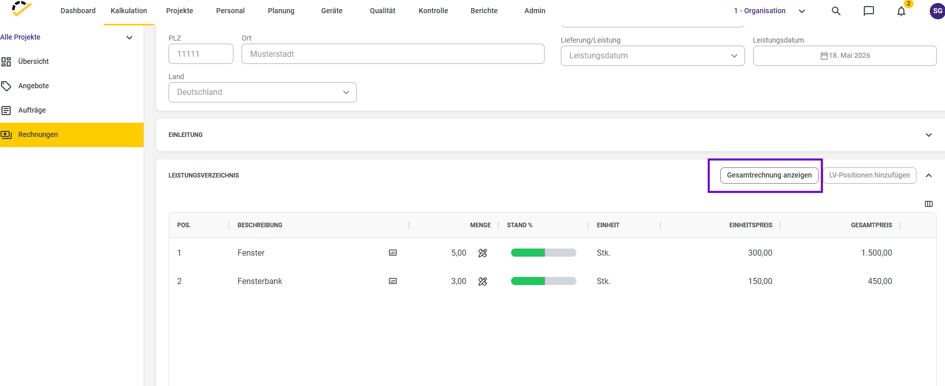
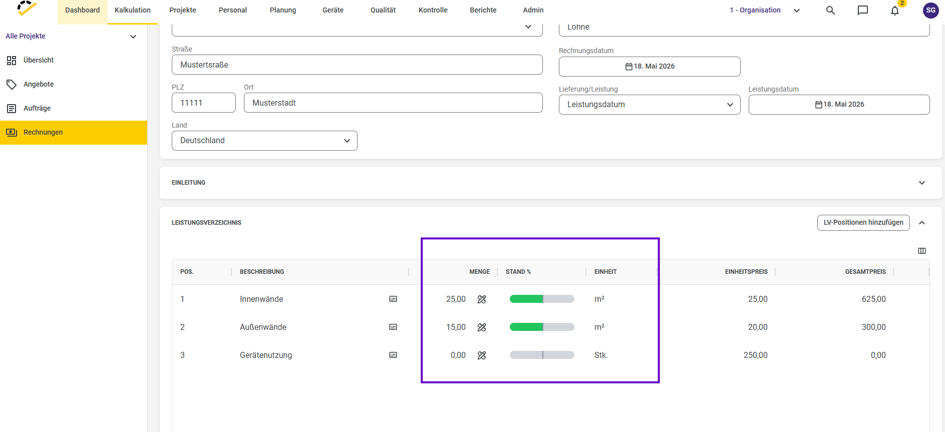
In the "Show Invoice Increase" view, you can see the total quantity, quantities already invoiced, and the current increase for each item.
5. Create and review the final invoice
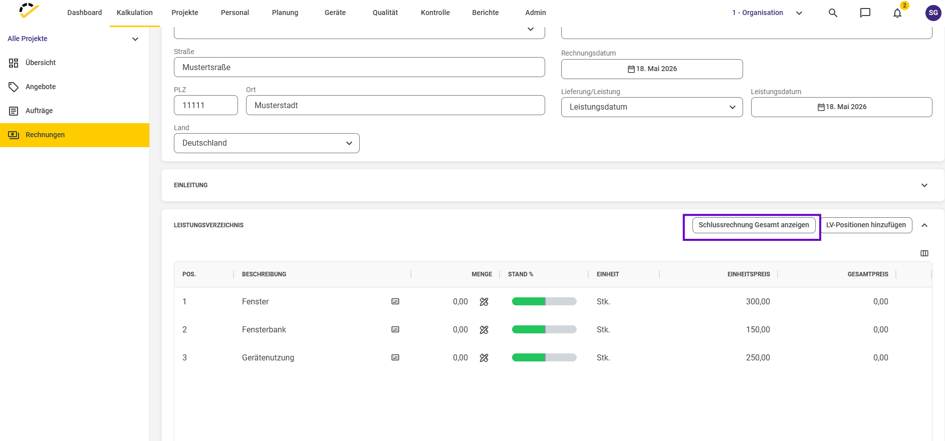
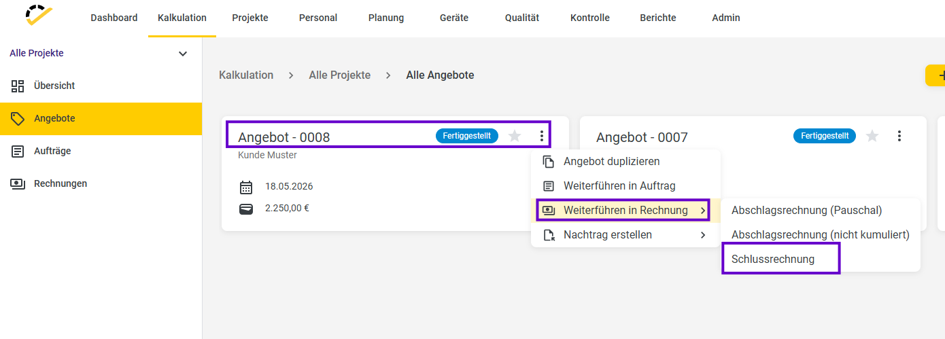
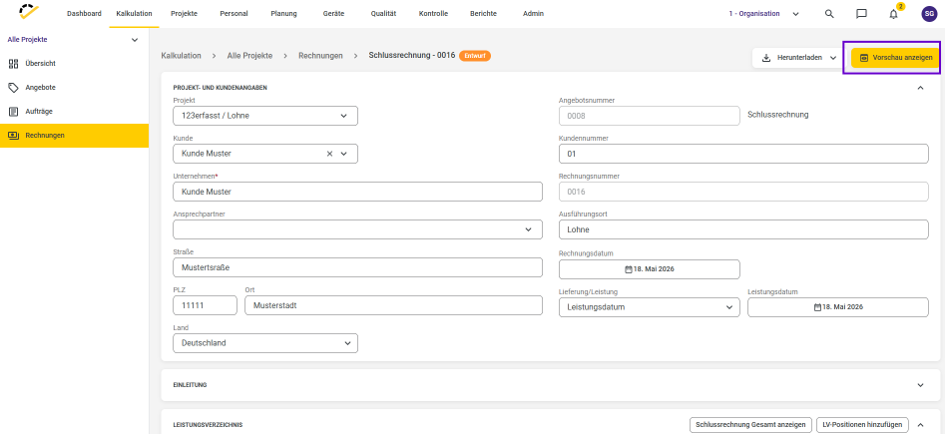
After the project is completed, open the quote and select Final Invoice.
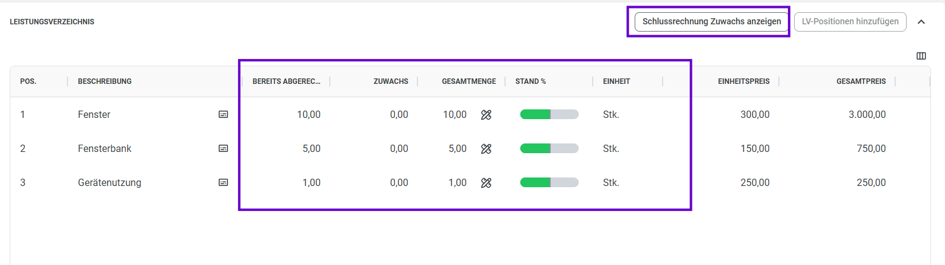
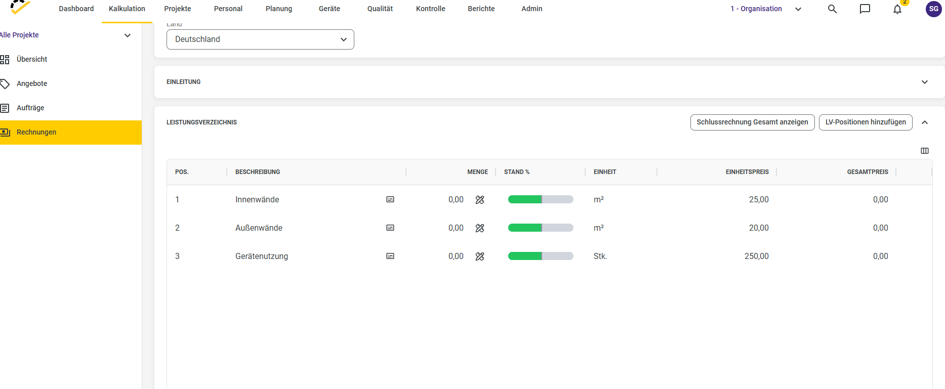
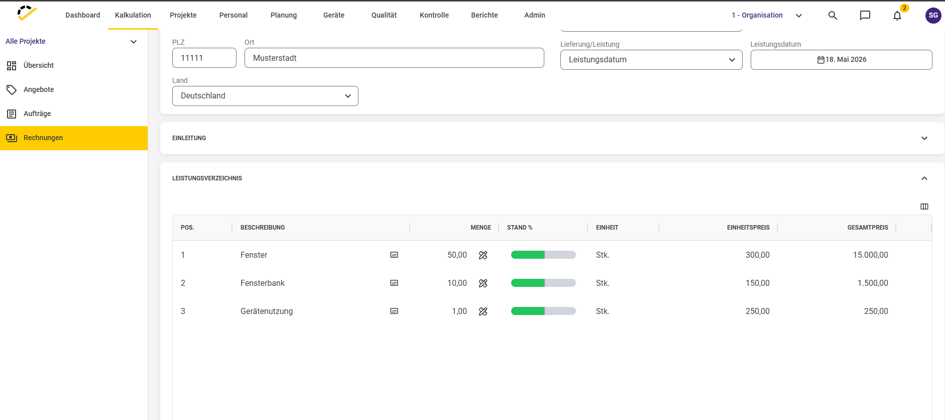
The final invoice contains the final quantities per bill of quantities item and automatically takes into account all services already invoiced.
In the summary overview, you can see the total quantity, quantities already billed, and remaining increase per item.
You can document any outstanding balances as usual via Add Payment.
Tip
The cumulative bill of quantities progress invoice is particularly suitable for longer or complex projects with multiple billing stages. Quantities already billed remain traceable at all times and are automatically carried over to the next invoice—so you always work with an up-to-date and complete billing basis.
Progress and Final Invoices by Bill of Quantities (Non-Cumulative)
With the "Progress Invoice (by Bill of Quantities, not cumulative)" function, you can create partial invoices directly based on individual Bill of Quantities items in your quote. Only the selected items or quantities are billed; previous progress invoices are not automatically accumulated—the final invoice accounts for previously billed and paid quantities separately.
Prerequisites
You are working in the Calculation module in the Quotes section.
The quote you want to invoice has the status Completed.
1. Continue the quote in an interim invoice based on the bill of quantities
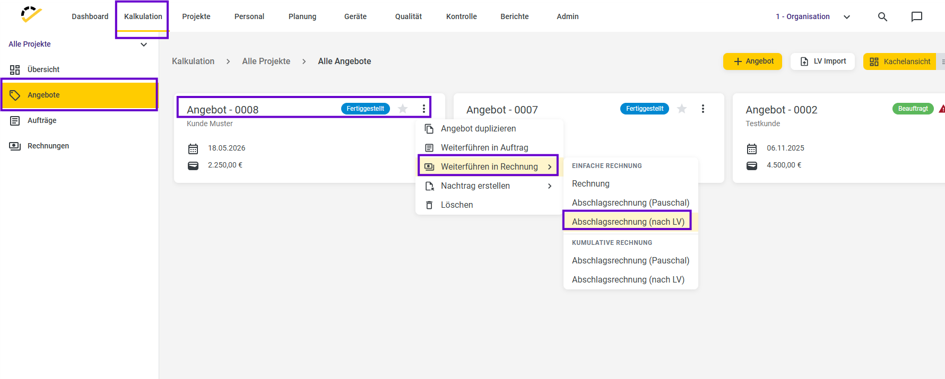
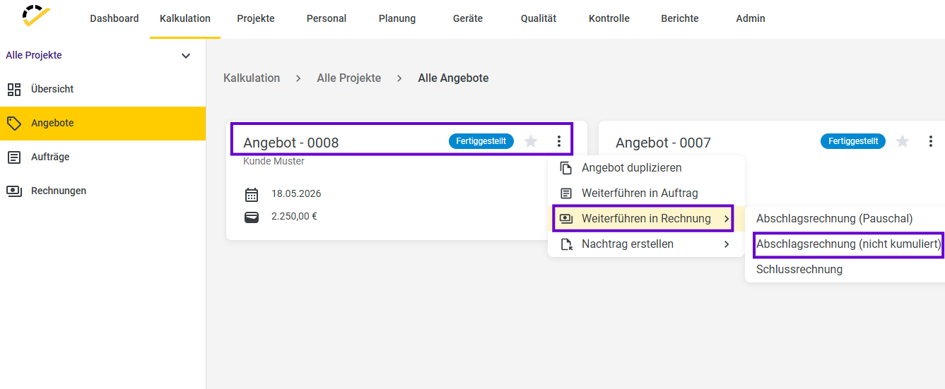
Open the completed quote in the Quotes section.
Click on the three vertical dots.
Select Continue to Invoice → Progress Invoice (based on Bill of Quantities).
This specifies that you want to invoice individual bill of quantities items or partial quantities from it.
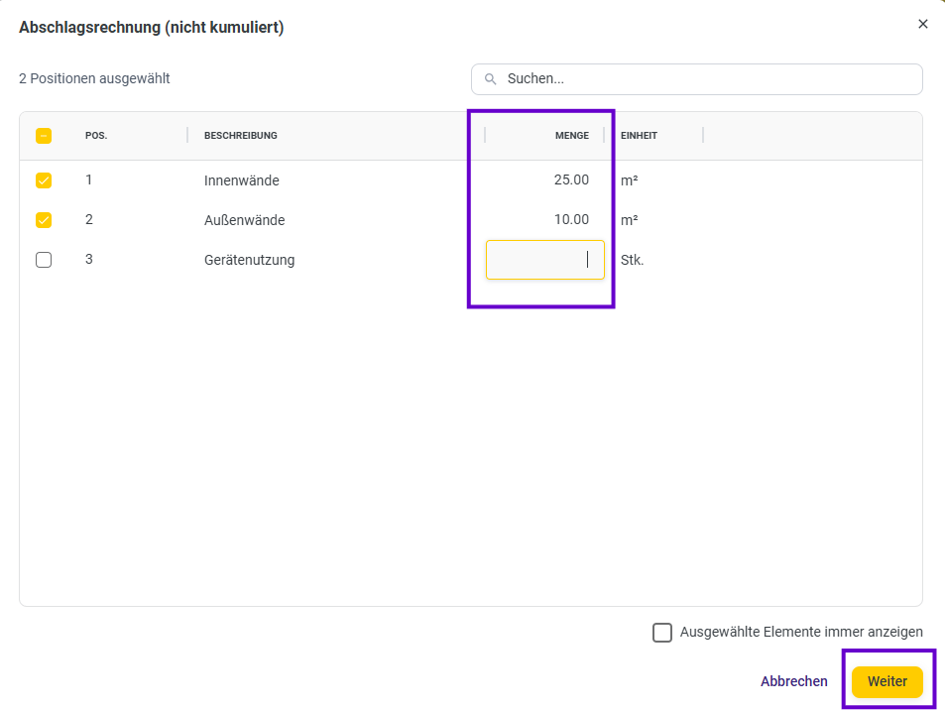
2. Select items for the partial invoice
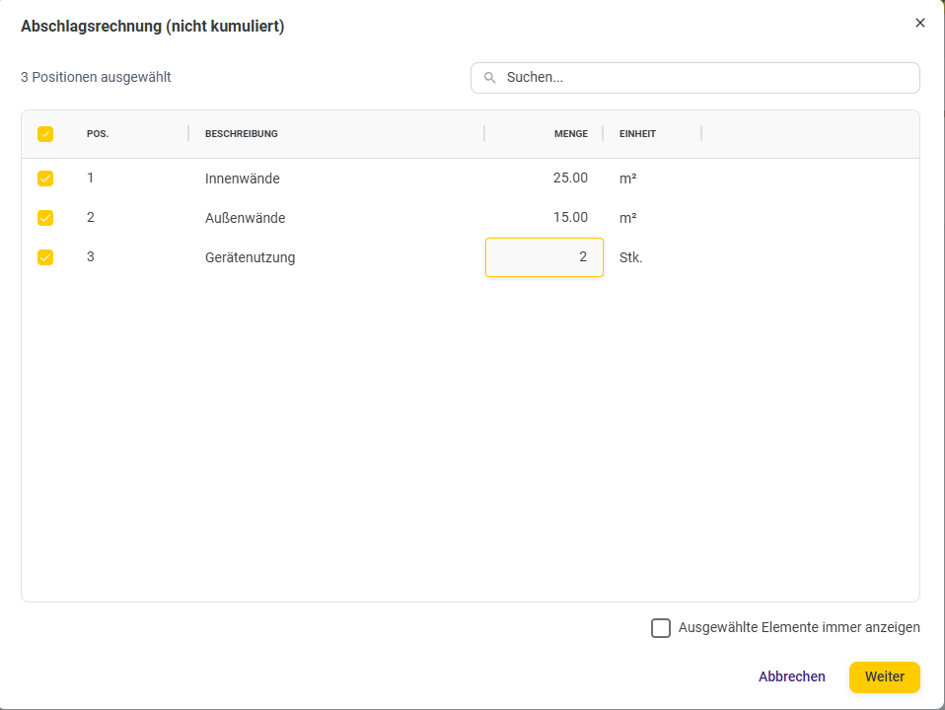
In the dialog, you’ll see all the bill of materials items in your quote.
Select the items you want to bill in this partial invoice.
Enter the quantity to be billed for each item (e.g., 25 out of 50 m²).
Confirm your selection—the system will generate a progress invoice with exactly these quantities and amounts.
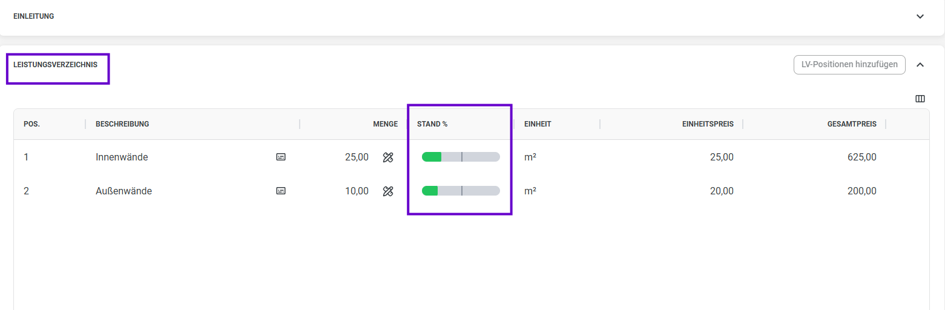
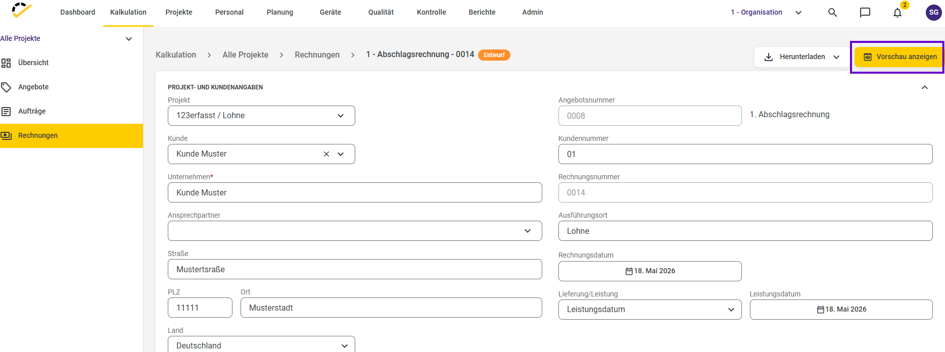
3. Review and finalize the progress invoice
Check the selected items, quantities, and totals.
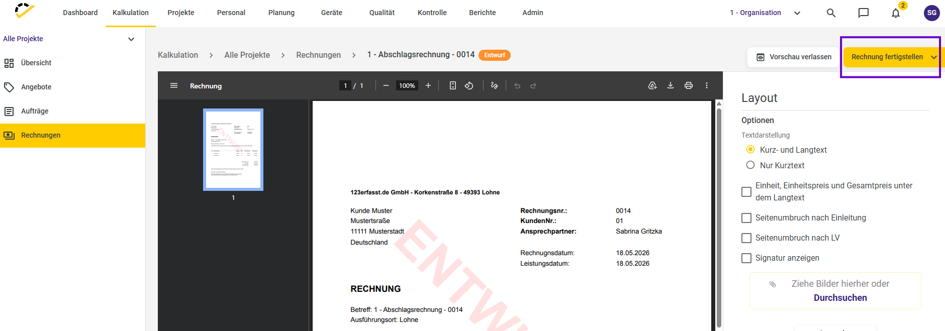
To finalize, go to "Show Preview" and check the layout and your text.
Then set the invoice to "Complete."
4. Add additional items later
Reopen the quote as work progresses.
Start again by selecting Continue in Invoice → Progress Invoice (based on Specifications).
In the dialog, use Add Specification Items to select additional items or remaining quantities.
Confirm by clicking Next.
Quantities that have already been invoiced remain visible, so you can see which remaining quantities are still open.
5. Create additional partial invoices
To create additional partial invoices, open the Partial Invoice (by PO) function again.
The system displays the quantities already used.
Simply add the new quantities or additional items that are to be billed now.
This allows you to bill your project step by step as work progresses, without automatically including previous invoices in the total.
6. Create and review the final invoice
After the project is completed, select Continue to Invoice → Final Invoice in the quote.
The final invoice shows the total quantity, quantities already billed, and the current increase that is still to be billed for each bill of quantities item.
Check quantities, net amounts, taxes, and the total before sending the final invoice.
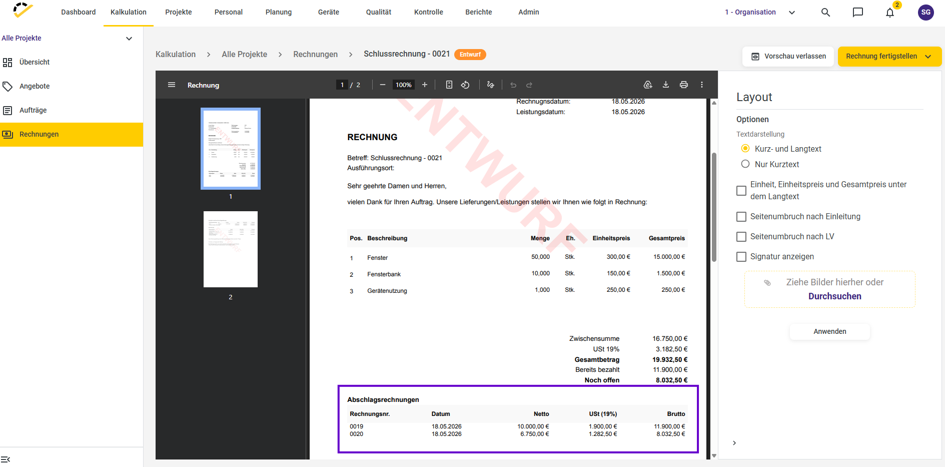
7. Generate the final invoice as a PDF and record payments
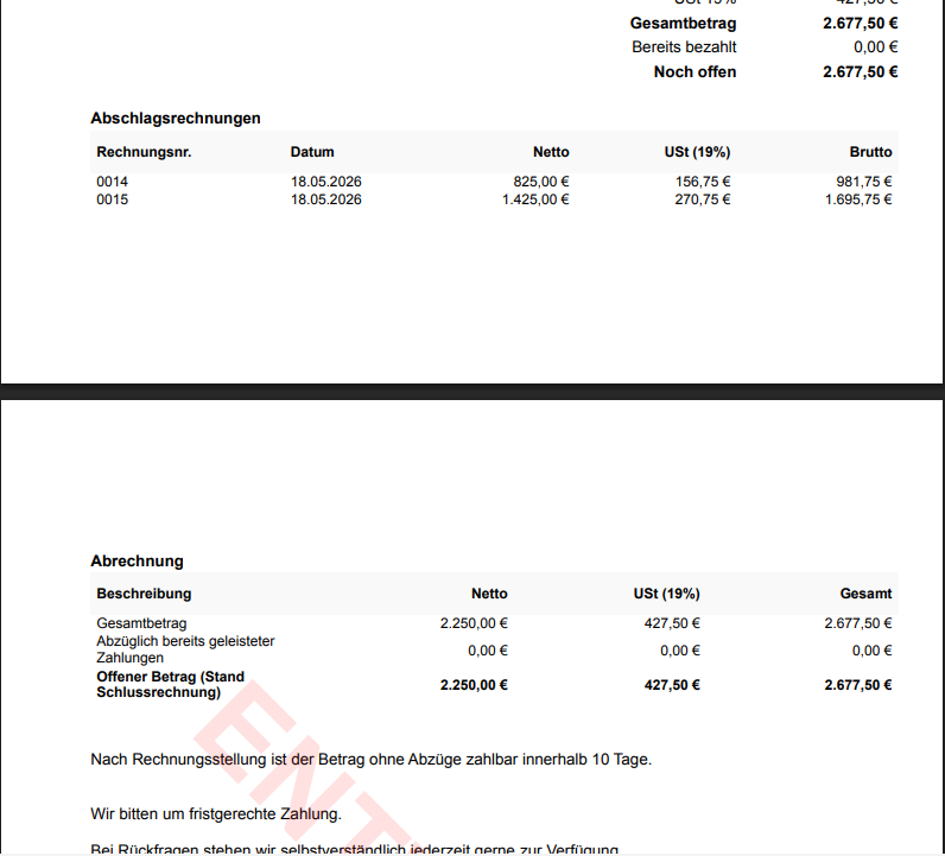
In the PDF of the final invoice, all previous progress invoices and the corresponding payments are displayed separately.
You can settle and document outstanding balances directly in the final invoice via the "Record Payment" function.
Tip:
The work order-based progress invoice (non-cumulative) is ideal for projects with ongoing construction progress or clearly defined work phases. You invoice only the items and quantities that have already been completed—without automatically including all previous progress invoices.
Simple Progress and Final Invoices (Non-Cumulative)
With the Simple Progress Invoice (Non-Cumulative) feature, you can create partial invoices from an existing quote with just a few clicks—without any accumulation. Each progress invoice is a separate, independent invoice, and the final invoice accounts for previously paid progress invoices separately.
Prerequisites
You are working in the Calculation module in the Quotes section.
The quote you want to invoice has the status "Completed."
1. Convert Quote to Progress Invoice
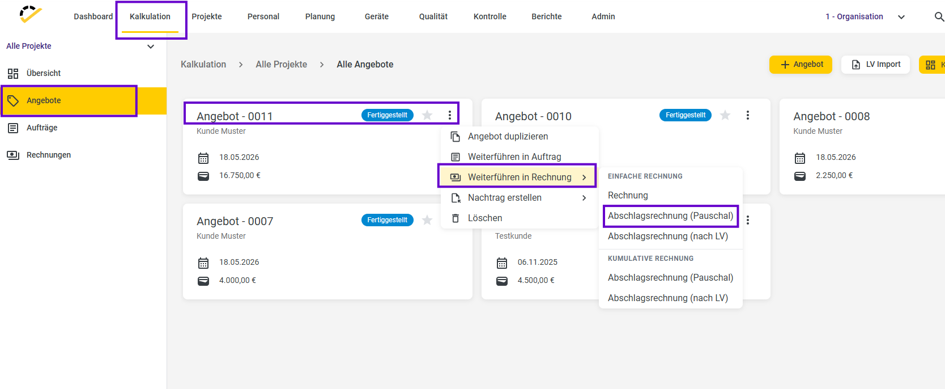
In the Quotes section, open the completed quote.
Click on the three vertical dots.
Select Continue to Invoice → Partial Invoice (Flat Rate).
This starts the creation of a simple partial invoice for this quote.
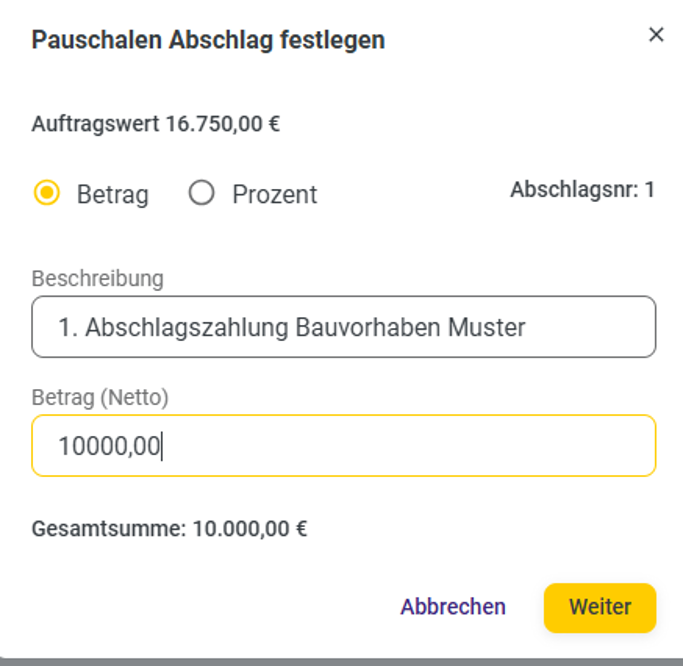
2. Set the down payment
Specify whether the down payment should be calculated as an amount or as a percentage of the quote value.
Enter a suitable description, e.g., 1st Installment Payment for Musterstraße Construction Project.
Enter the desired net amount or percentage and click Continue.
The down payment invoice is created as a simple invoice with a single line item whose total amount exactly matches your defined down payment.
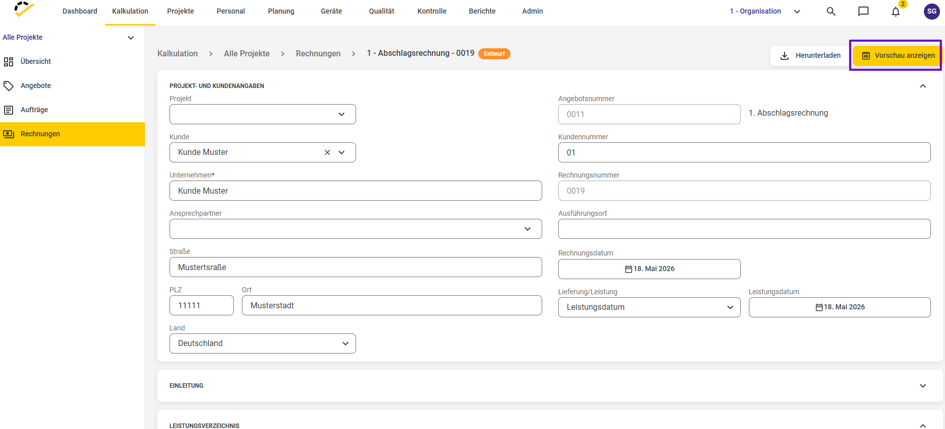
3. Review and finalize the progress invoice
Check the amounts and the total of the down payment invoice.
Adjust the layout and text as needed.
Finalize the invoice and send it to your customer.
4. Record payment
After sending the invoice or receiving payment, open the installment invoice.
Click on "Record payment."
Enter the payment date, payment method, and amount, then save the payment.
This way, you keep all partial payments neatly documented.
5. Create additional partial invoices
If further partial payments are due, repeat the same process:
Open quote → Continue to invoice → Installment invoice (flat rate).
Each installment invoice is created as a separate, independent invoice and is not automatically combined with previous installments.
This way, you always retain control over when and in what amount you issue partial invoices.
6. Create a final invoice
Once the project is complete, open the quote again.
Select Continue to Invoice → Final Invoice.
The final invoice includes all items from the original quote; partial payments already made are deducted separately and marked as paid.
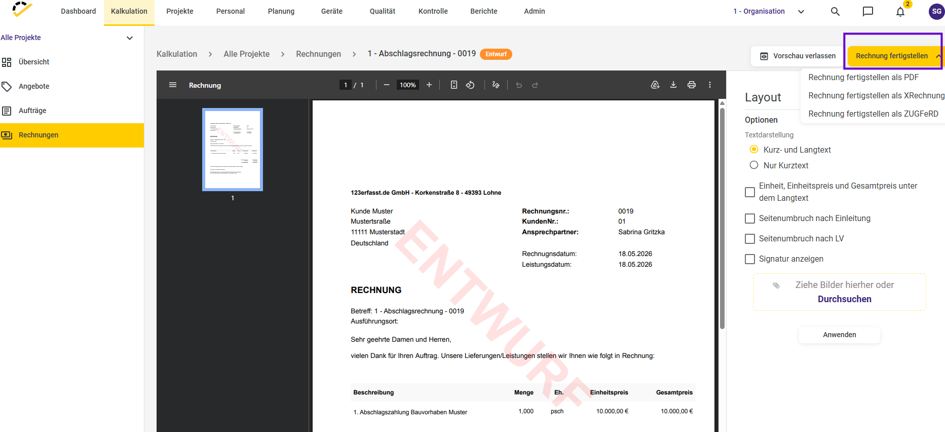
7. Review the final invoice and save as PDF
Check the final invoice for completeness and to ensure that the partial payment invoices have been correctly accounted for.
The PDF of the final invoice clearly displays all previous partial invoices and the payments received.
This allows your customer to see exactly which partial amounts have already been paid and how the outstanding balance is calculated.
Tip
The simple, non-cumulative progress invoice is particularly suitable for manageable projects with clear partial payments. Each progress invoice is created and paid separately, while the final invoice automatically ensures that all payments already made are correctly deducted from the total amount.